Well-manicured nails are beautiful to look at. However, the beauty gets accentuated by a coat of high-quality gel nail polish. It makes the nails noticeable and lets the woman make a powerful fashion statement. Do you wish to learn how to acquire a beautiful gel nail manicure? Read on to understand the gel manicure process that you can very well master at home.
Step by Step Apply Gel Nail Starter Kit
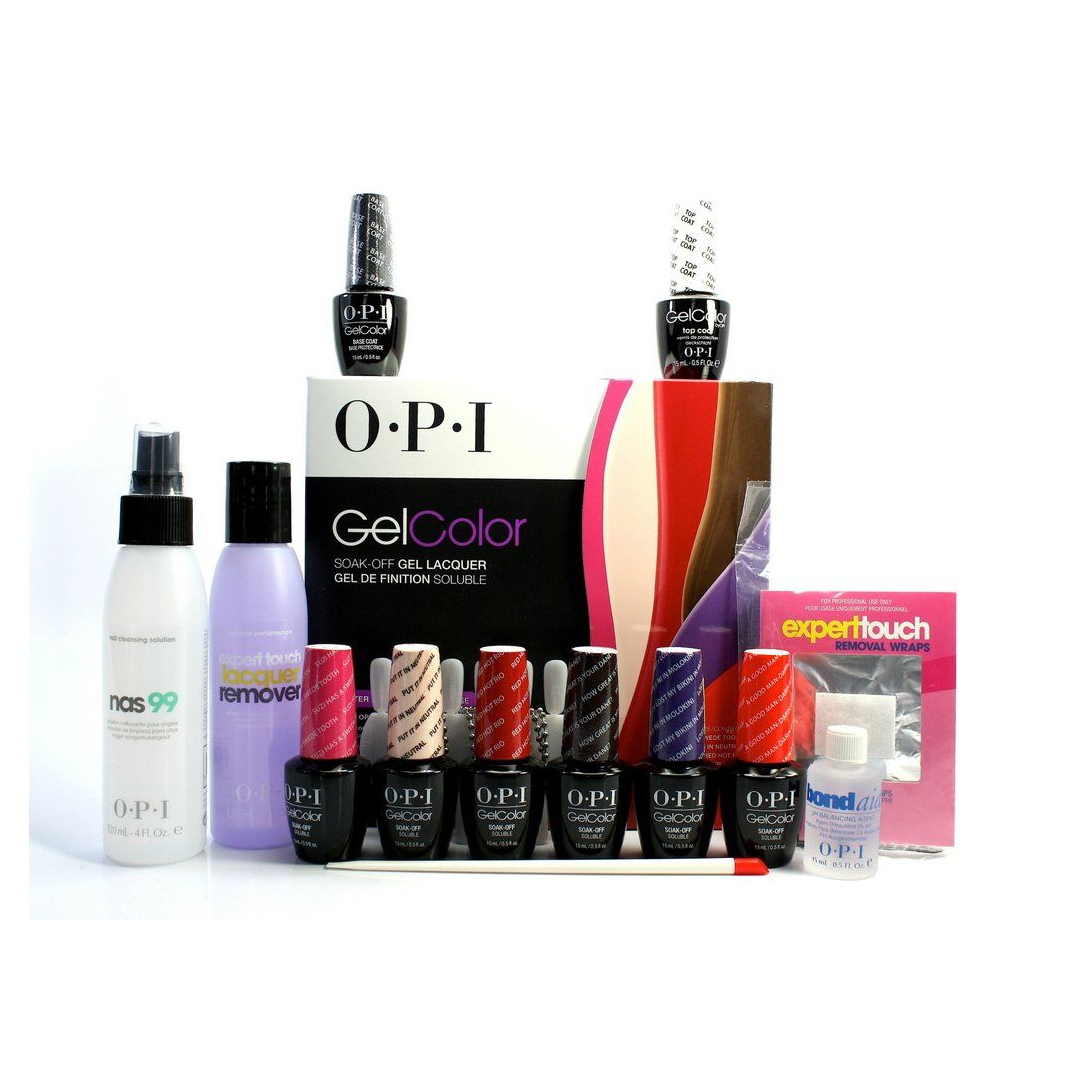
Get your nail starter kit ready
The first step towards acquiring the dream gel manicure is to get your nail starter kit ready. If you have one in your home, it should be fine. Otherwise, the OPI gel nail starter kit is easily available online. In addition, you can order your kit from us at reasonable prices.
Understand what your starter kit contains
Your starter kit contains all the ingredients required to help you acquire the best nail manicure. It comprises the following items:
Sterilized nail file and buff – These implements help you shape the nails and prep them for your exquisite manicure.
Cuticle pusher – The cuticle pusher helps push the cuticle into the grooves and keeps them away from your gel polish layer.
Cotton wipes – These wipes are handy to remove traces of nail polish that spill over to the skin. They are also useful for removing the tacky layer after the final curing under the UV lamp.
Nail polish removing solution – It is essential to remove your existing gel polish coating before applying a fresh one. The nail polish removing solution enables you to do that.
Basecoat and topcoat – The primary ingredients of a gel nail manicure are the basecoat and topcoat applications. Any gel manicure is incomplete without these ingredients.
We keep the UV lamp and OPI gel color out of the starter kit. The color you choose to have is a matter of choice. You get an extensive range of gel colors on our website. Similarly, the UV lamp is an optional item in your starter kit. Generally, people have UV lamps in their homes. These lamps last long and do not require frequent replacement.
Now that you have your starter kit ready let us go into the gel nail manicure process.
Remove the existing nail polish layer
If you already have nail polish on your nails, it is essential to remove it before a new application. Generally, you can scrape away the polish layer. However, thicker layers require you to follow a specific procedure.
The nail polish remover solution can help in this regard. All you do is soak cotton balls in the solution and place them over the nails. Next, tie an aluminum wrap over the cotton balls to hold them in place. Wait for around 30 minutes to allow the acetone to soak into the polish layer and dissolve it. The nail polish layer slides off the nail surface layer automatically.
Prep your nails for the job
Prepping your nails includes cutting and reshaping them according to your preferences. One should ensure no sharp edges as it could cause lifting of the nail polish layer soon. Similarly, the cuticles should be pushed back into their grooves. Having a nail polish layer over the cuticles is a sure recipe for disaster.
Finally, you buff your nail surface to make it conducive to adhere to the basecoat application.
The basecoat application is critical
Now, your nails are ready for the basecoat application. Your OPI gel starter kit features the basecoat. Apply it using a clean brush in straight lines starting from the base of the nail moving upwards towards the edges. It is necessary to cure the basecoat layer for around 30 seconds under the UV lamp.
When applying the basecoat, you should steer clear of the cuticles. It is the best way to prevent the gel color from sticking to the cuticles.
The gel color application follows
Once your basecoat is ready, you can start with painting your gel color layers. OPI nails is available in a range of exciting colors. You can choose the preferred color from our website when ordering your requirements.
It is advisable to apply one layer at a time. Use a clean brush to apply the gel color layer, and do not forget to cure each layer under the UV lamp for 30 to 45 seconds. It allows the polish layer to harden and stick to the basecoat.
The topcoat application process is the final part of your manicure
Finally, you apply the topcoat layer over your gel color. Depending on your requirements, you can go for a single coat or multiple applications. However, you should ensure to cure each application layer under a UV lamp.
Conclusion
Your beautiful gel nails are ready, but they could have a tacky appearance. You can use a lint-free cotton wipe to remove the tacky layer. Now, you have the set of beautiful nails to show off on your Instagram or Pinterest handles.